
Update 08/09/2022
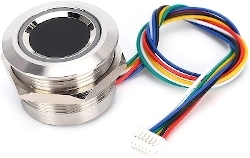
Optical sensor becomes unreponsive after prolonged use.
Changed to capacitive sensor. No failure has occured since.
Original Post
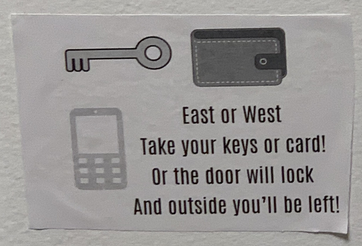
The door locks of the Duke dorms annoy everyone. They are designed to be opened by either 1.phone tapping AND entering a password, or 2.using a key. Major hassle. Gotta bring our keys to toilet, shower, basically whenever we leave our rooms. And not surprisingly, people forgot their keys all the time, and had to knock on the RA’s door at 3AM and beg,”can you plsssss open my door for me. I am soooooo sorry”
The school even wasted money to put up reminders like this:
To solve this problem, I decided to make a fingerprint lock. It is low-cost, safe, and no more key problems!
Design Criteria
Here are some criteria which must be met in order for this project to be a success.
- 1.Safety: fingerprints other than mine and my roomates’should not open my door (low false accept rate).
- 2.Speed: opens in <1s: I do not wanna be spending 5 seconds just to open the door when I am late for class.
- 3.Durable: would be annoying if it needs constant fixing.
- 4.Does not alter the original lock: such that no trouble from the school and the facility guys.
Overall Design
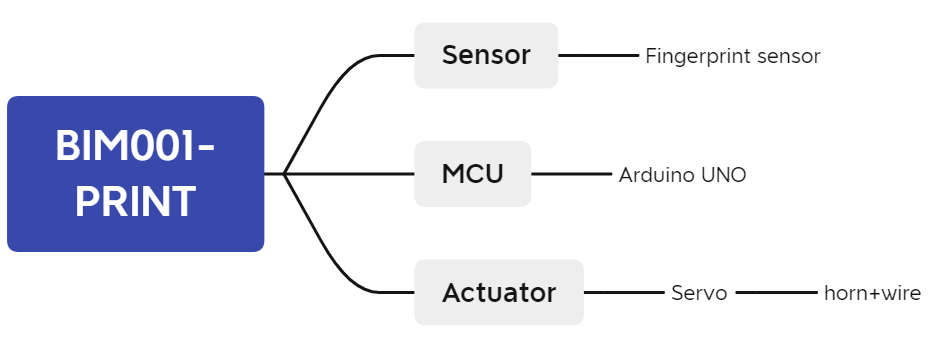
What we have here is a simple and classic sensor-MCU-actuator workflow. The fingerprint sensor verifies the identity of the fingerprint, sends input to the Arduino, which instructs the servo horn to rotate, pulling down a wire that is tied to the door handle. Open sesame!
Sensor
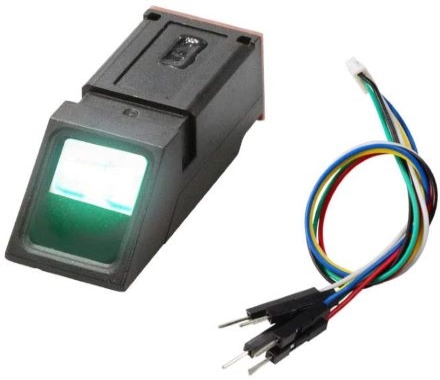
I used the Arduino 6-pin green-light optical fingerprint module (FPM11A, costs $17.99 on Amazon). It comes with this nice little guide that helped me tremendously with wiring. It is also compatible with the Adafruit Fingerprint library which has all the code needed to register and verify fingerprints.
Actuator
We need a powerful motor, and we need decent positional accuracy (to rotate to the exact position that opens the door). Servo motors are perfect for this job. Here is a starter guide to servo motors.
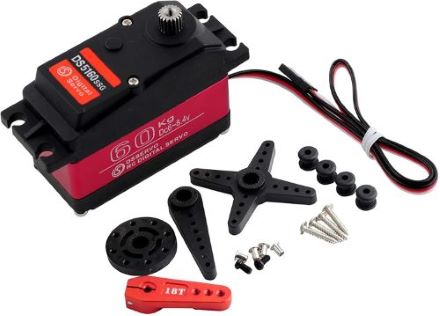
However, our door handle is heavy, so those mg996r and sg90 servos you find in the lab are not enough for this job. I got the ds5160ssg servo which outputs a crazy torque of 70kg/cm at top voltage (8.4v), which dwarfs the 10kg/cm of mg996r. Plus, it only costs $36.99.
Circuit
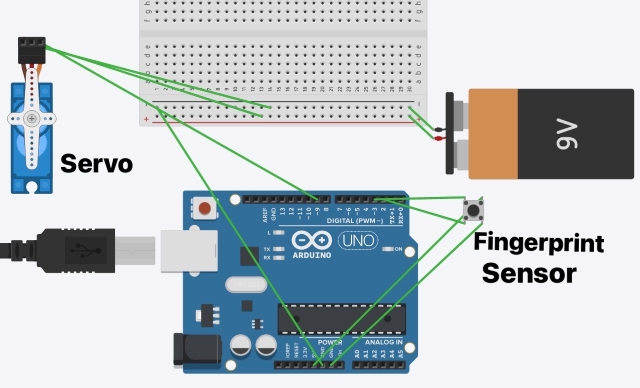
See the circuit diagram above. For fingerprint sensor, 4 of the 6 pins are used, which are connected to 5v, GND, digital 2 and 3 respectively. For servo, the three pins are connected to the 9v power, GND, and digital 9 respecitvely.
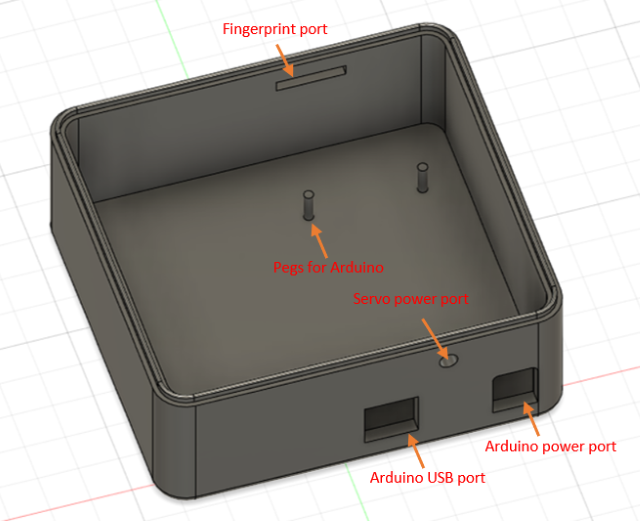
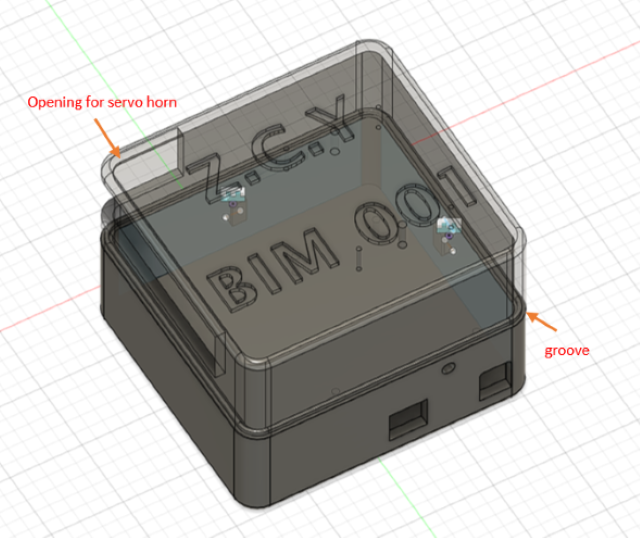
3D-printed casing
All these components and wires are not very aesthetically pleasing, so it will be nice if we 3D-print a casing to conceal our servo and Arduino. Moreover, this case should include features that tightly secures the boards and wires in place.
Here is the design.
Top part (lid):
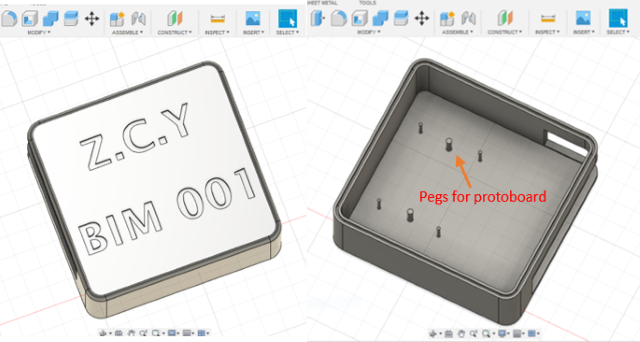
Bottom part:
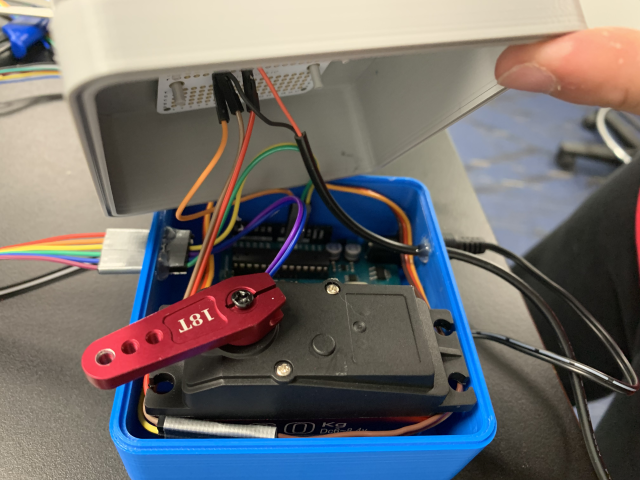
Complete view:
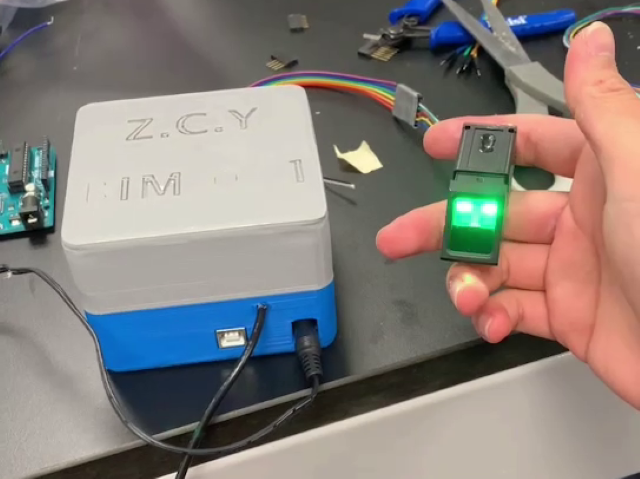
Assembled product:
Installation onto the door:
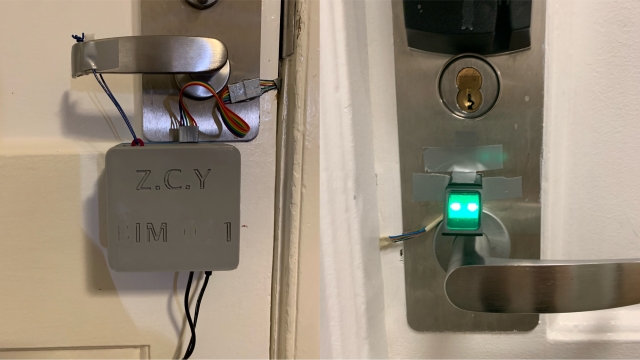
Now we have a working fingerprint lock!
Clickable Resouces
Arduino code and Fusion360 project files
Fingerprint sensor guide
Servo guide